How can I create a Message Template?
The first steps are identical to those applied when creating a message. The procedure is already described in detail in the article, "How do I create a message?".
- In your FACT24, go to "Messages" via "Administration" and click on "New message". Alternatively, you can also edit an existing message.
- Enter a unique name for the message template. The name of a message template should be identified, e.g. by adding "Template".
- Make sure you have selected "Notification" for message type when creating the message template.
- Assign the message template to one or more devices. Meanwhile, enter the message template in the fields provided (see following screenshot).
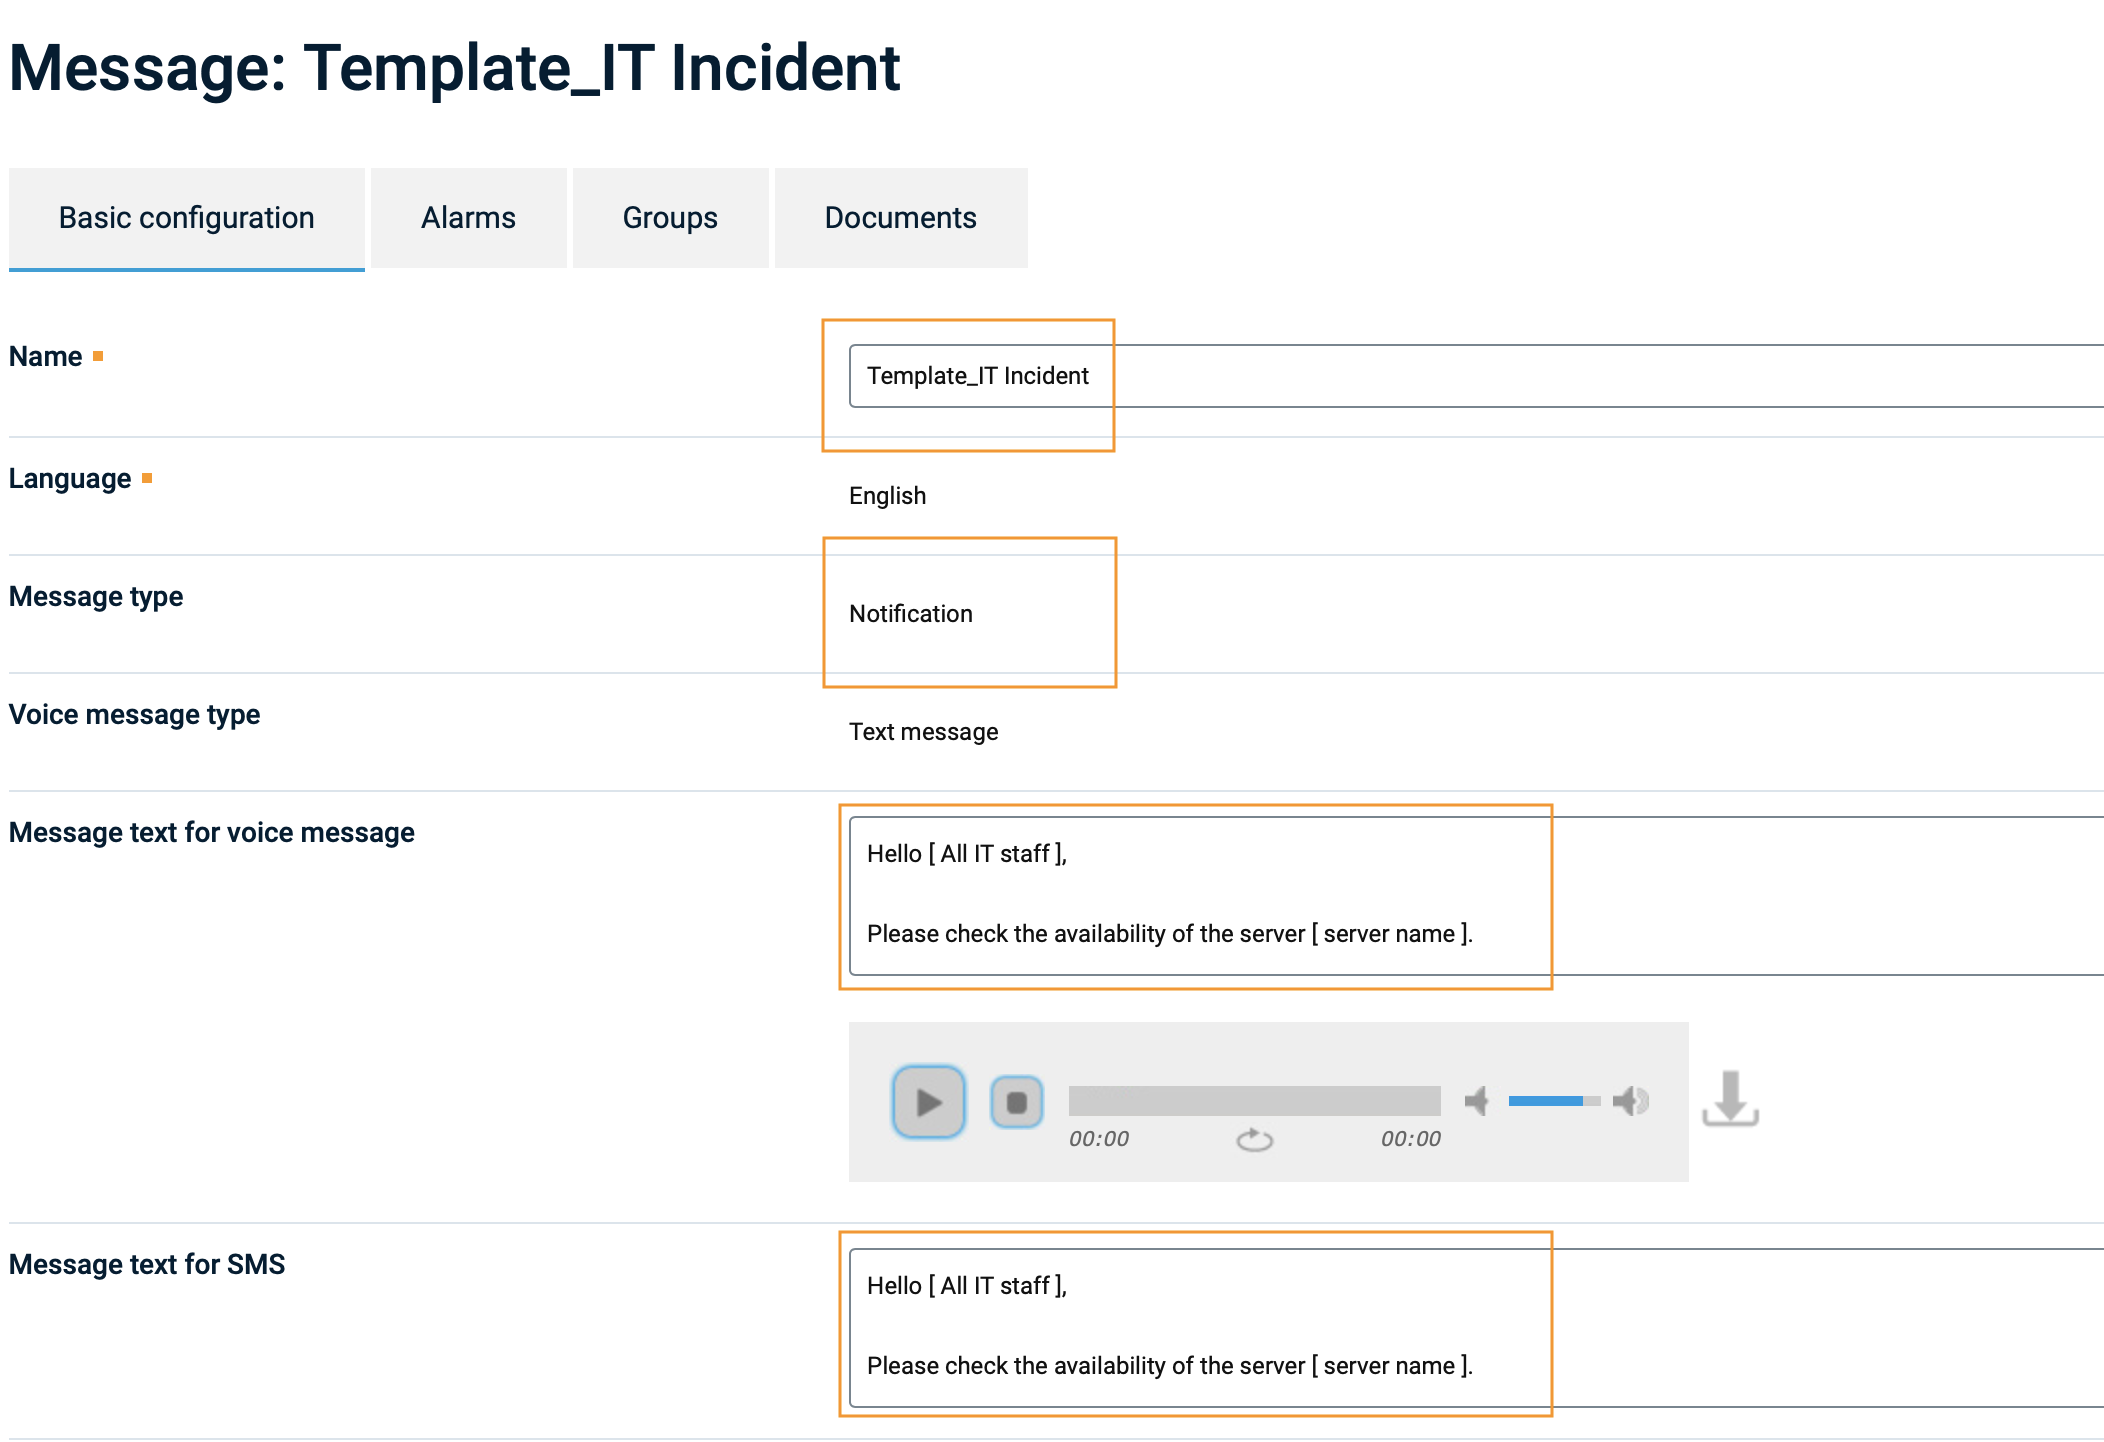
Fig.: Creating a message template
- With alarm level, the Message Template can be assigned to an alarm. To do this, go to the item: "Messages". Here you will see a new column: "Message template". First, click on "Assign" and select "Variable message". In the column, "Message template", there will appear: "Change message assignment".
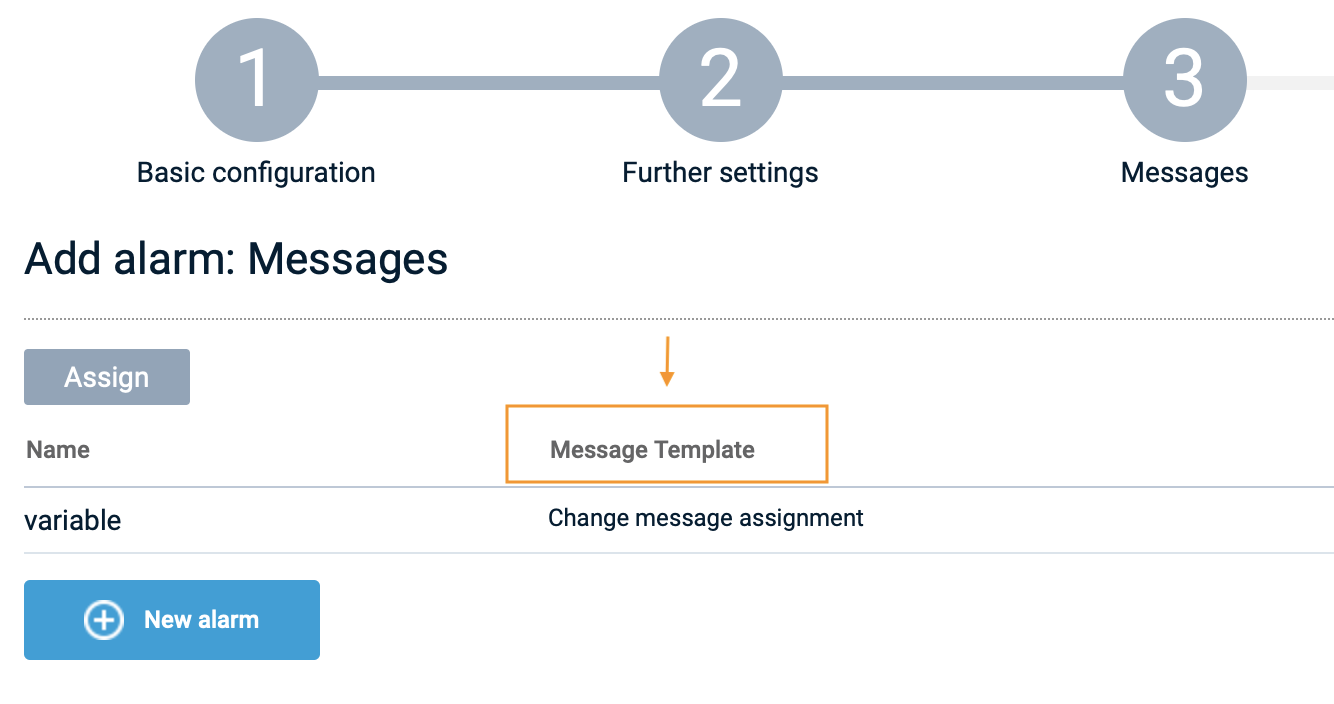
Fig.: Column: Message template
- Click on "Change message assignment" and select the previously created message template, e.g. "Template_IT incident". You can also select multiple message templates.
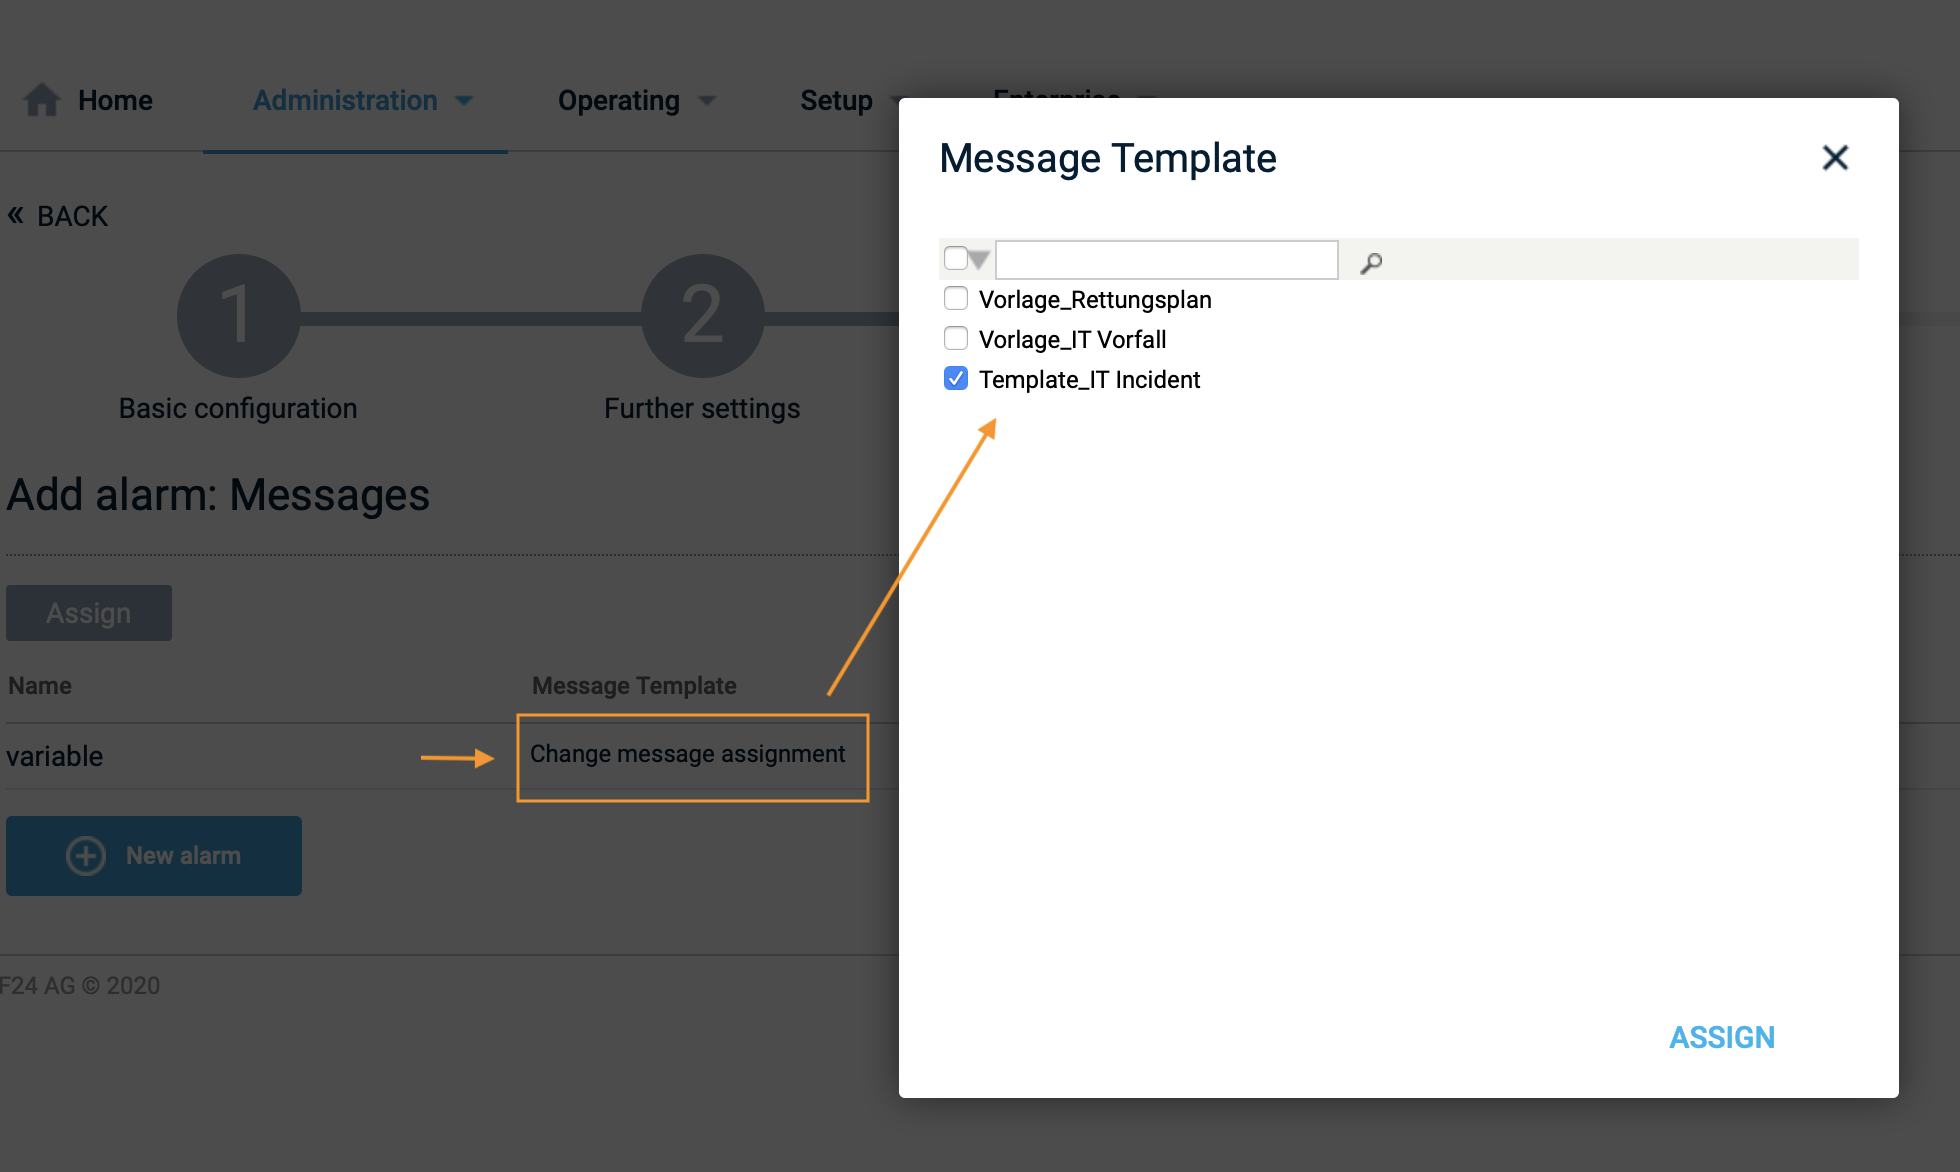
Fig.: Selecting the Message Template
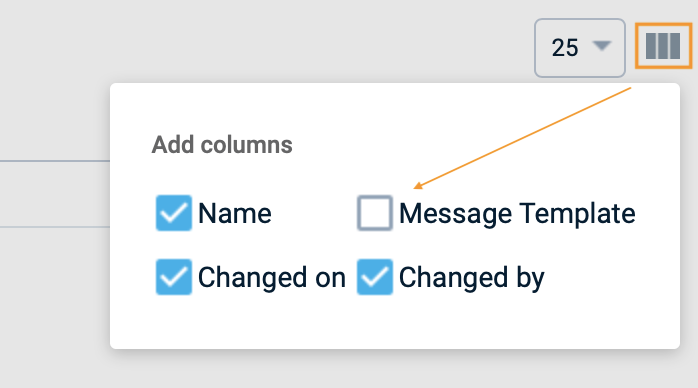
Fig.: Removing the "Message Template" column
- Activate an alarm and customize the Message Template, simply by editing the pre-filled fields for messages. You will still be able to copy into all message fields as normal.
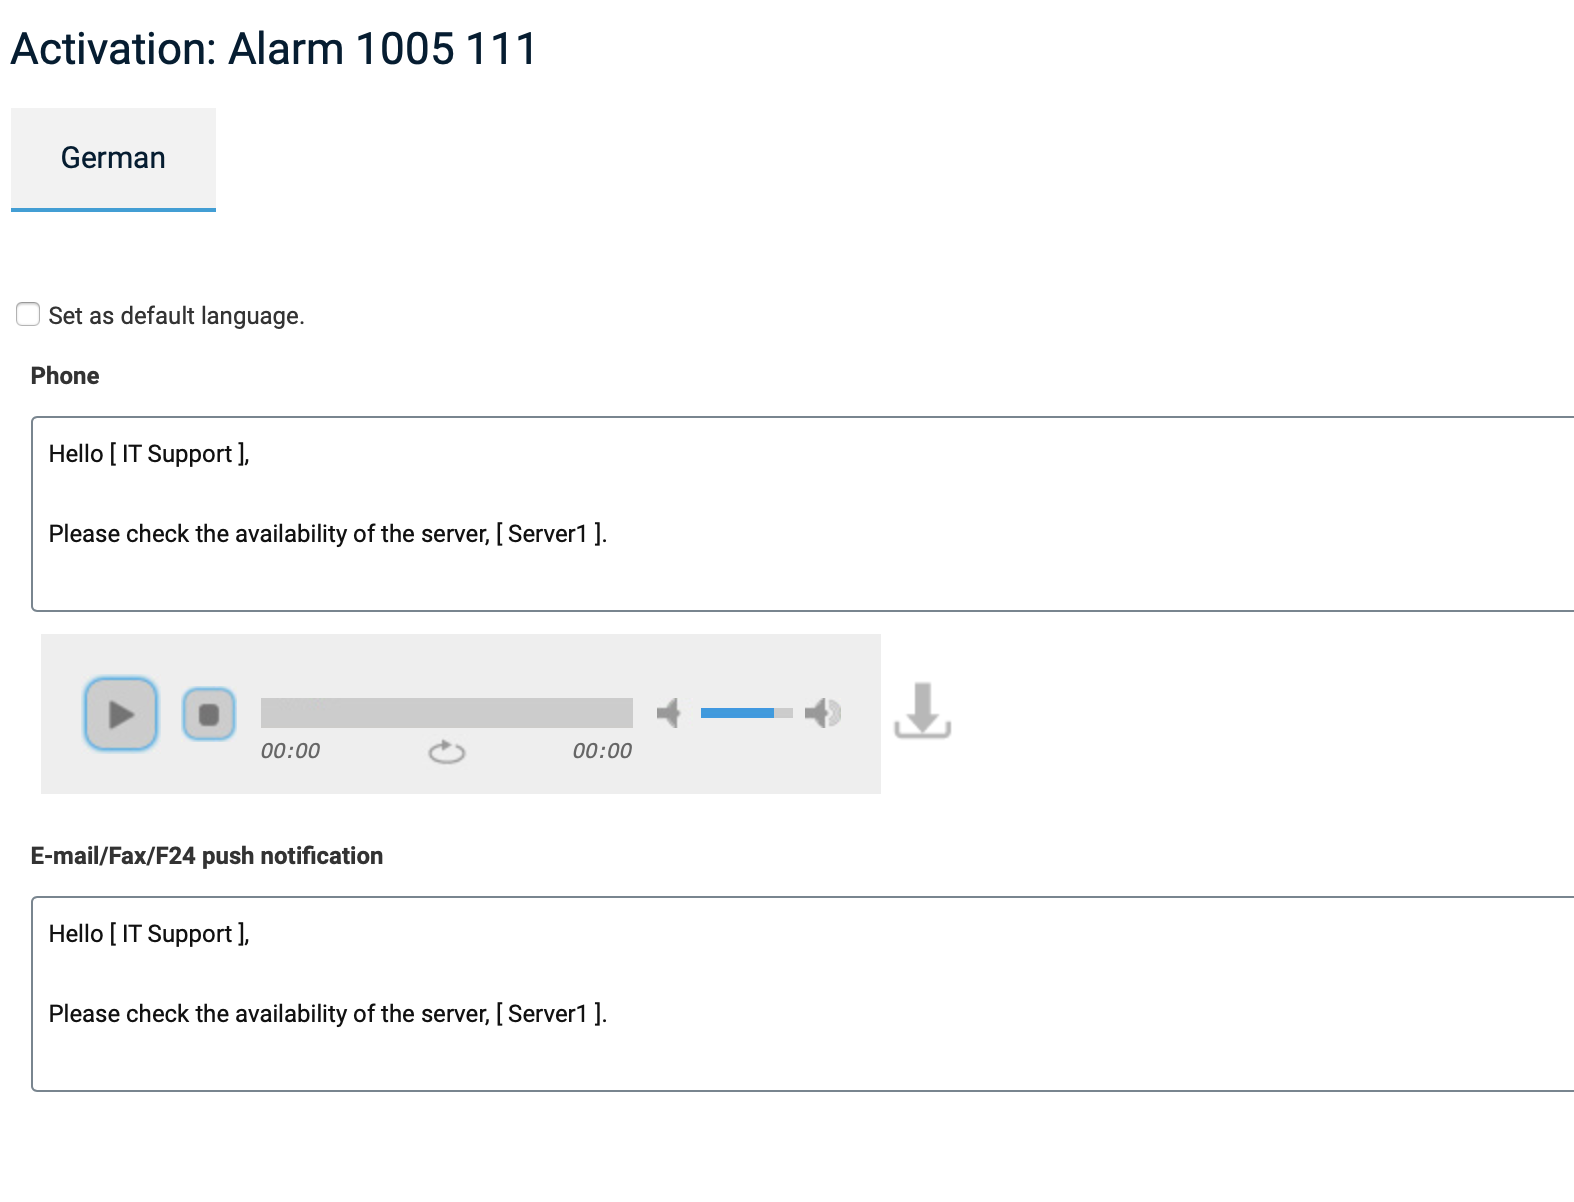
Fig.: Customising Message Templates when alarm is activated
- You can check the messages for sending in the alarm preview.
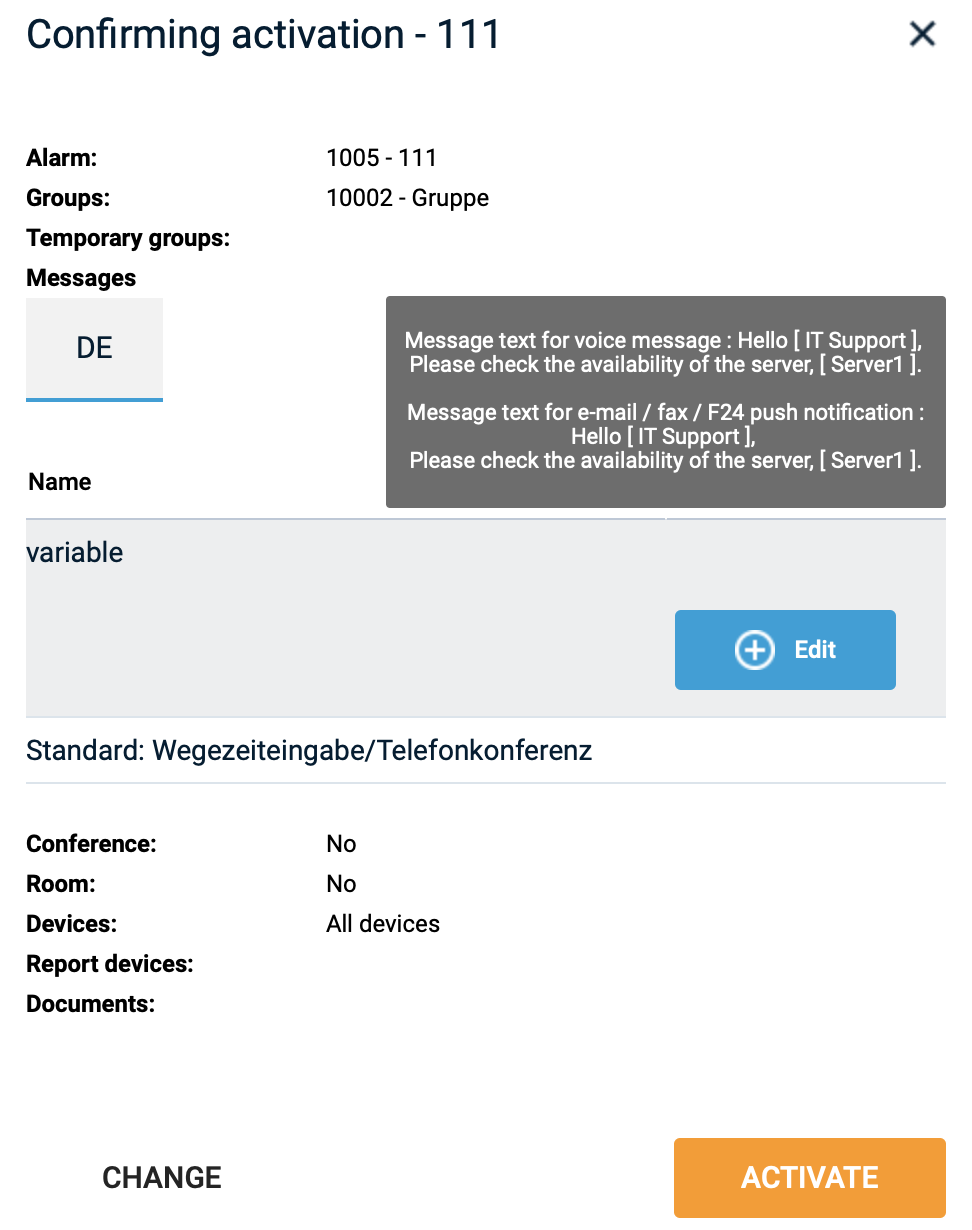
Fig.: Checking and confirming activation
