Caller ID verification in FACT24
In this article you will learn how to verify a Caller ID in your FACT24 account. To activate this function, you may need to take action:
- If you have set an F24 number as Caller ID or simply left this value blank, you do not need to do anything and we will activate this service for you.
- If you have set a custom number as Caller ID (often an extension of your company number or another local number), please go through the short verification process after the 10th of June 2023.
IMPORTANT NOTE on the use of caller IDs
Please note that the transmission of caller IDs can behave differently depending on the country of residence of the call recipient. Alerts by telephone call in FACT24 are usually technically made from our F24 servers in Germany and are therefore categorised as calls from abroad in all other countries.
The transmission of telephone calls is the responsibility of the network operators in the respective countries and is beyond our control. In some countries, such as China or Switzerland, calls coming from abroad are handled very strictly. This means that the number is not transmitted despite verification (instead, "Unknown caller" or the real technical number appears, which can vary). In some cases, calls are also blocked.
We recommend using a caller ID verified by F24, as these come directly from the telecommunications operator and generally offer a higher transmission probability than company-specific telephone numbers. However, transmission of the caller ID cannot be guaranteed.
We also recommend using alternative alerting channels such as email, SMS or push notification for every telephone alert, especially in light of this.
Step-by-step instruction:
The Caller ID verification needs to be done for every organisational unit separately. You have two possibilities to make sure you use a verified Caller ID and thus the alert is delivered reliably:
A) Use an F24 verified Caller ID
We deliver several local phone numbers out of the box which you can use as a reliable Caller ID.
These are the so-called local call-back numbers, which ensure that a recipient can give feedback to an alarm by calling back that number, even if he has missed a call.
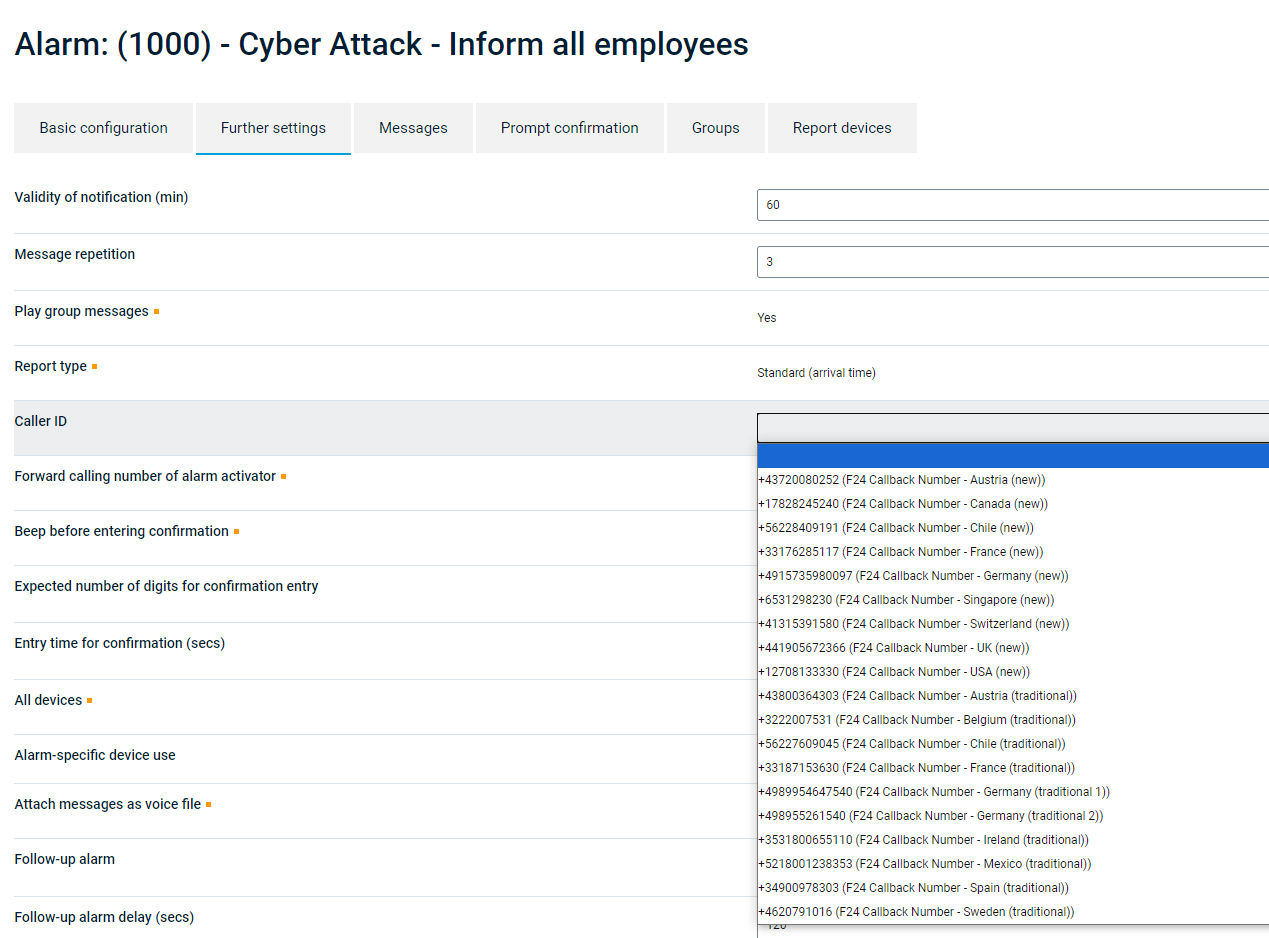
You can simply choose these numbers directly on the Alarm settings page. We suggest selecting the country with the belonging number, where the recipients of the Alarm stay.
B) Verify your organisation's owned number
If you want to use a company specific number/extension to be displayed when alarms are received, you need to verify it before. In this step by step guide we have explained the process to verify your own organisation's phone number as caller ID.
After verification it is very likely the number is displayed, but ultimately depends on the telecommunication provider.
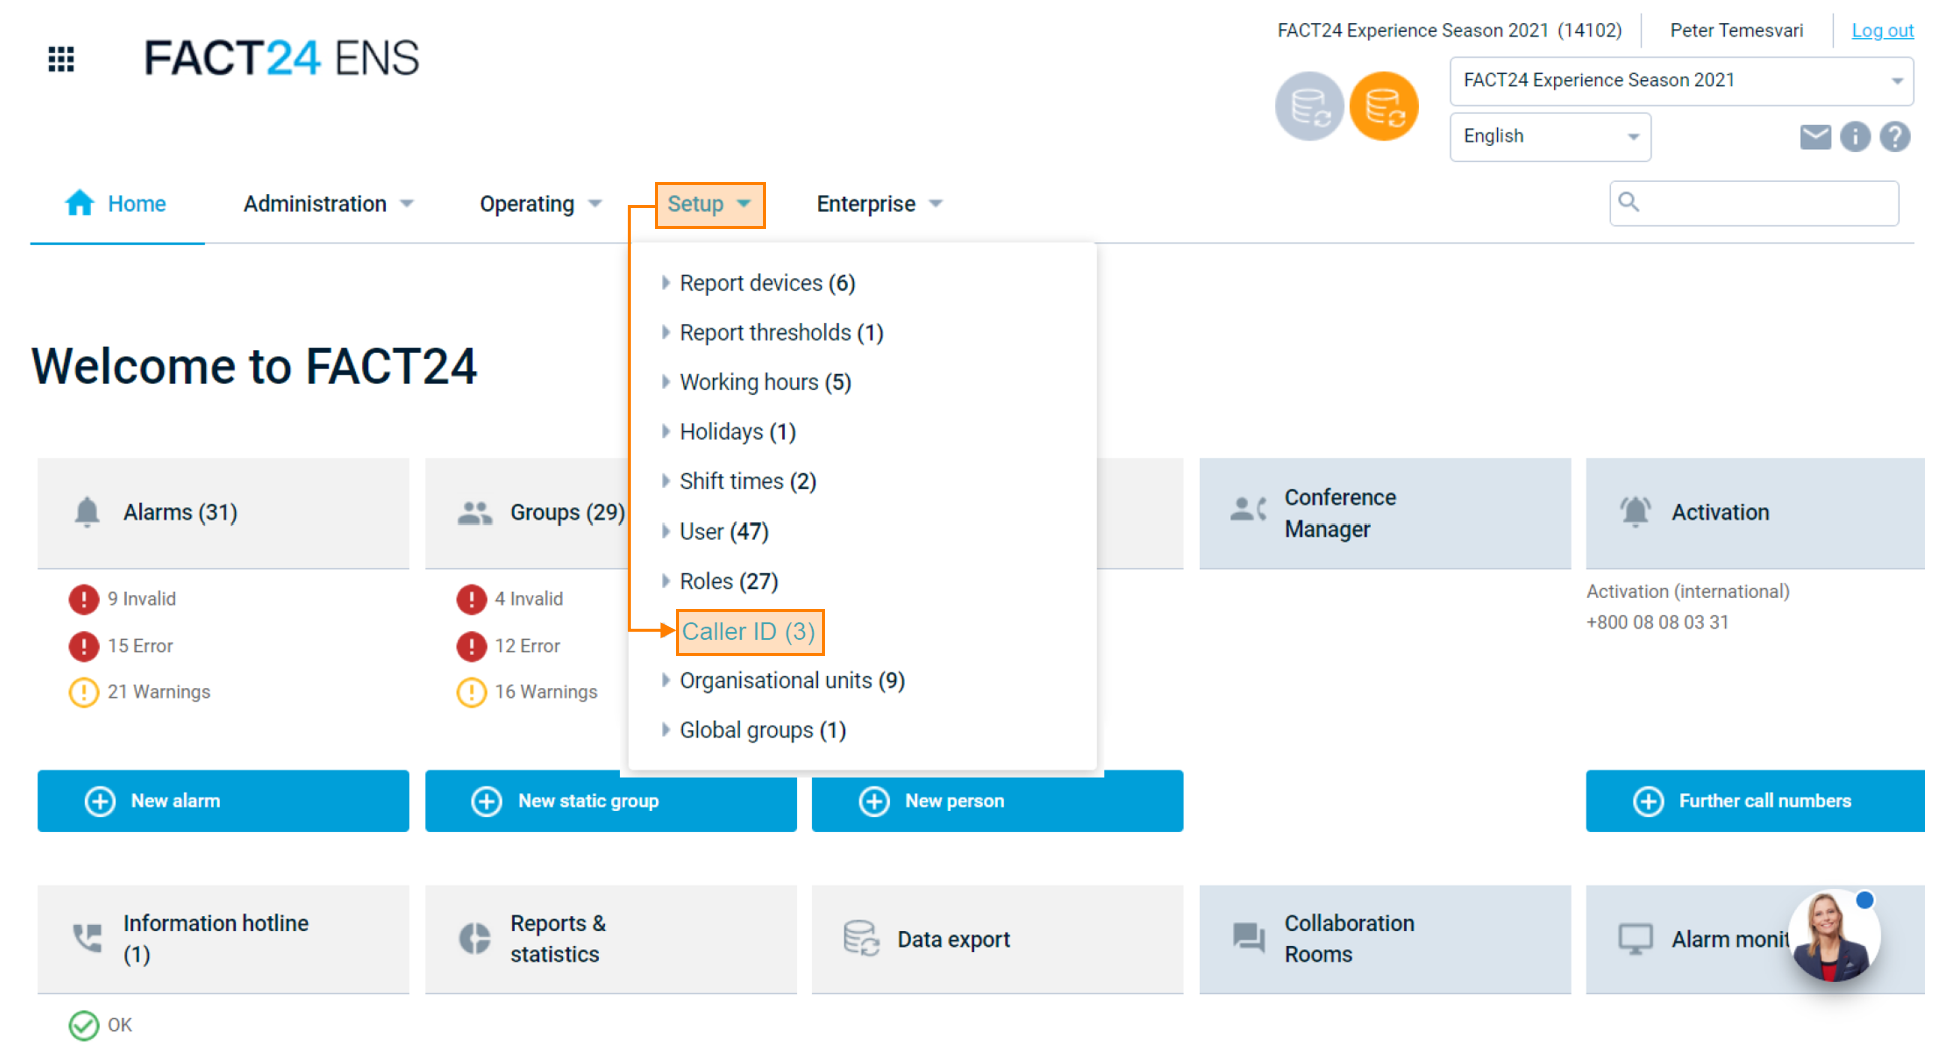
- On the FACT24 Homepage, go to "Setup" and then click "Caller ID".
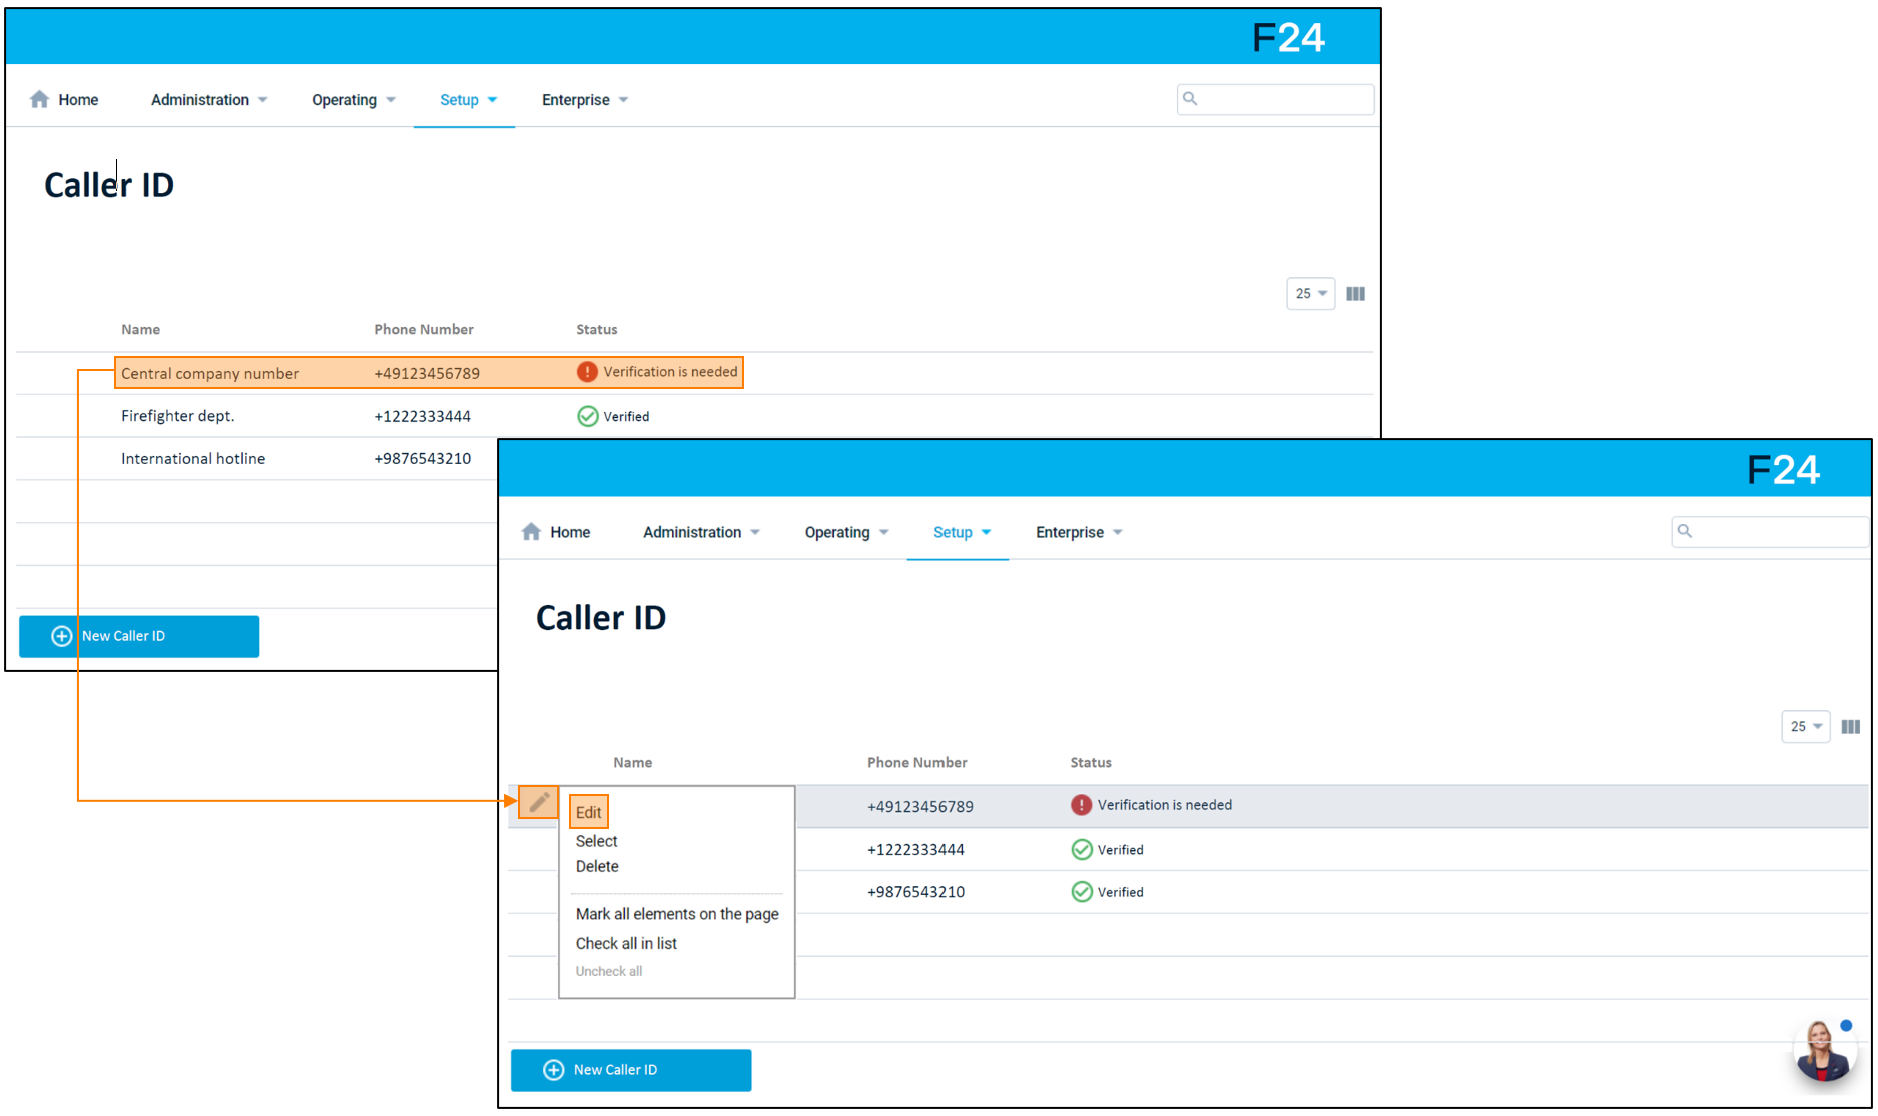
- On the next page it is shown which phone number needs verification. Click the pencil icon on the left of the respective number and then "Edit".
- In the settings, click "Verify Caller ID". A window opens with instructions on how to start the verification process. Click "Start Verification".
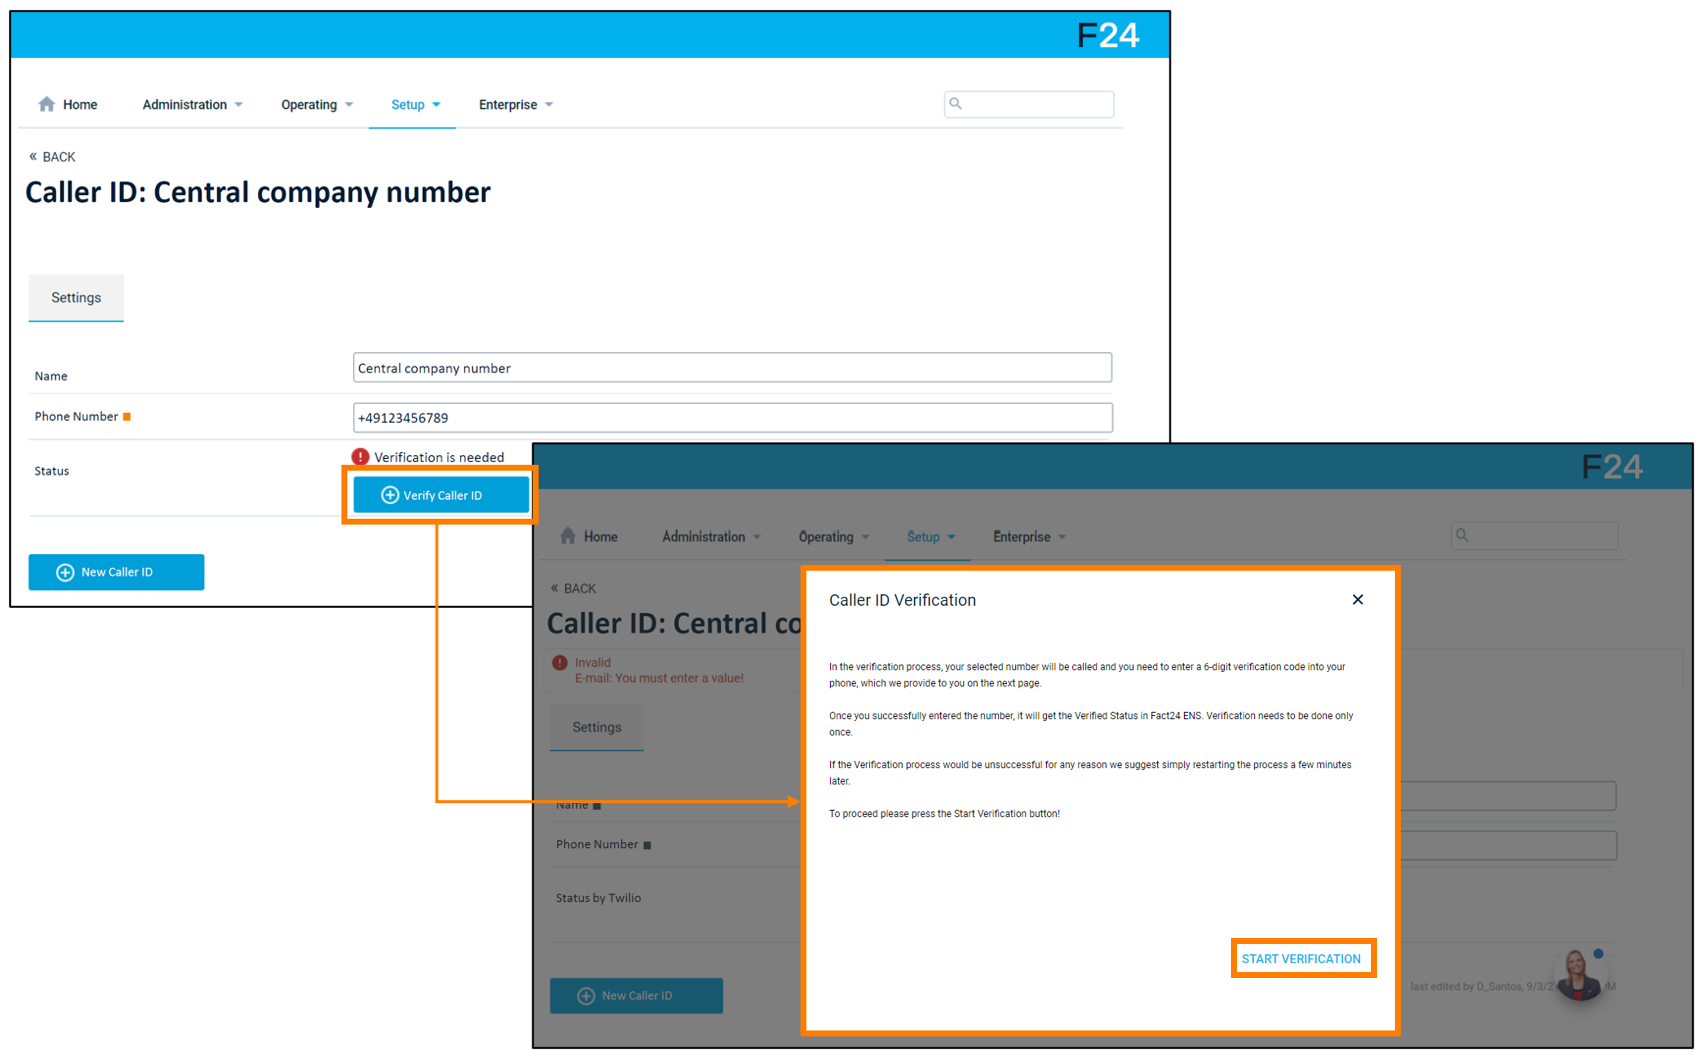
- Another window will pop up with further instructions.
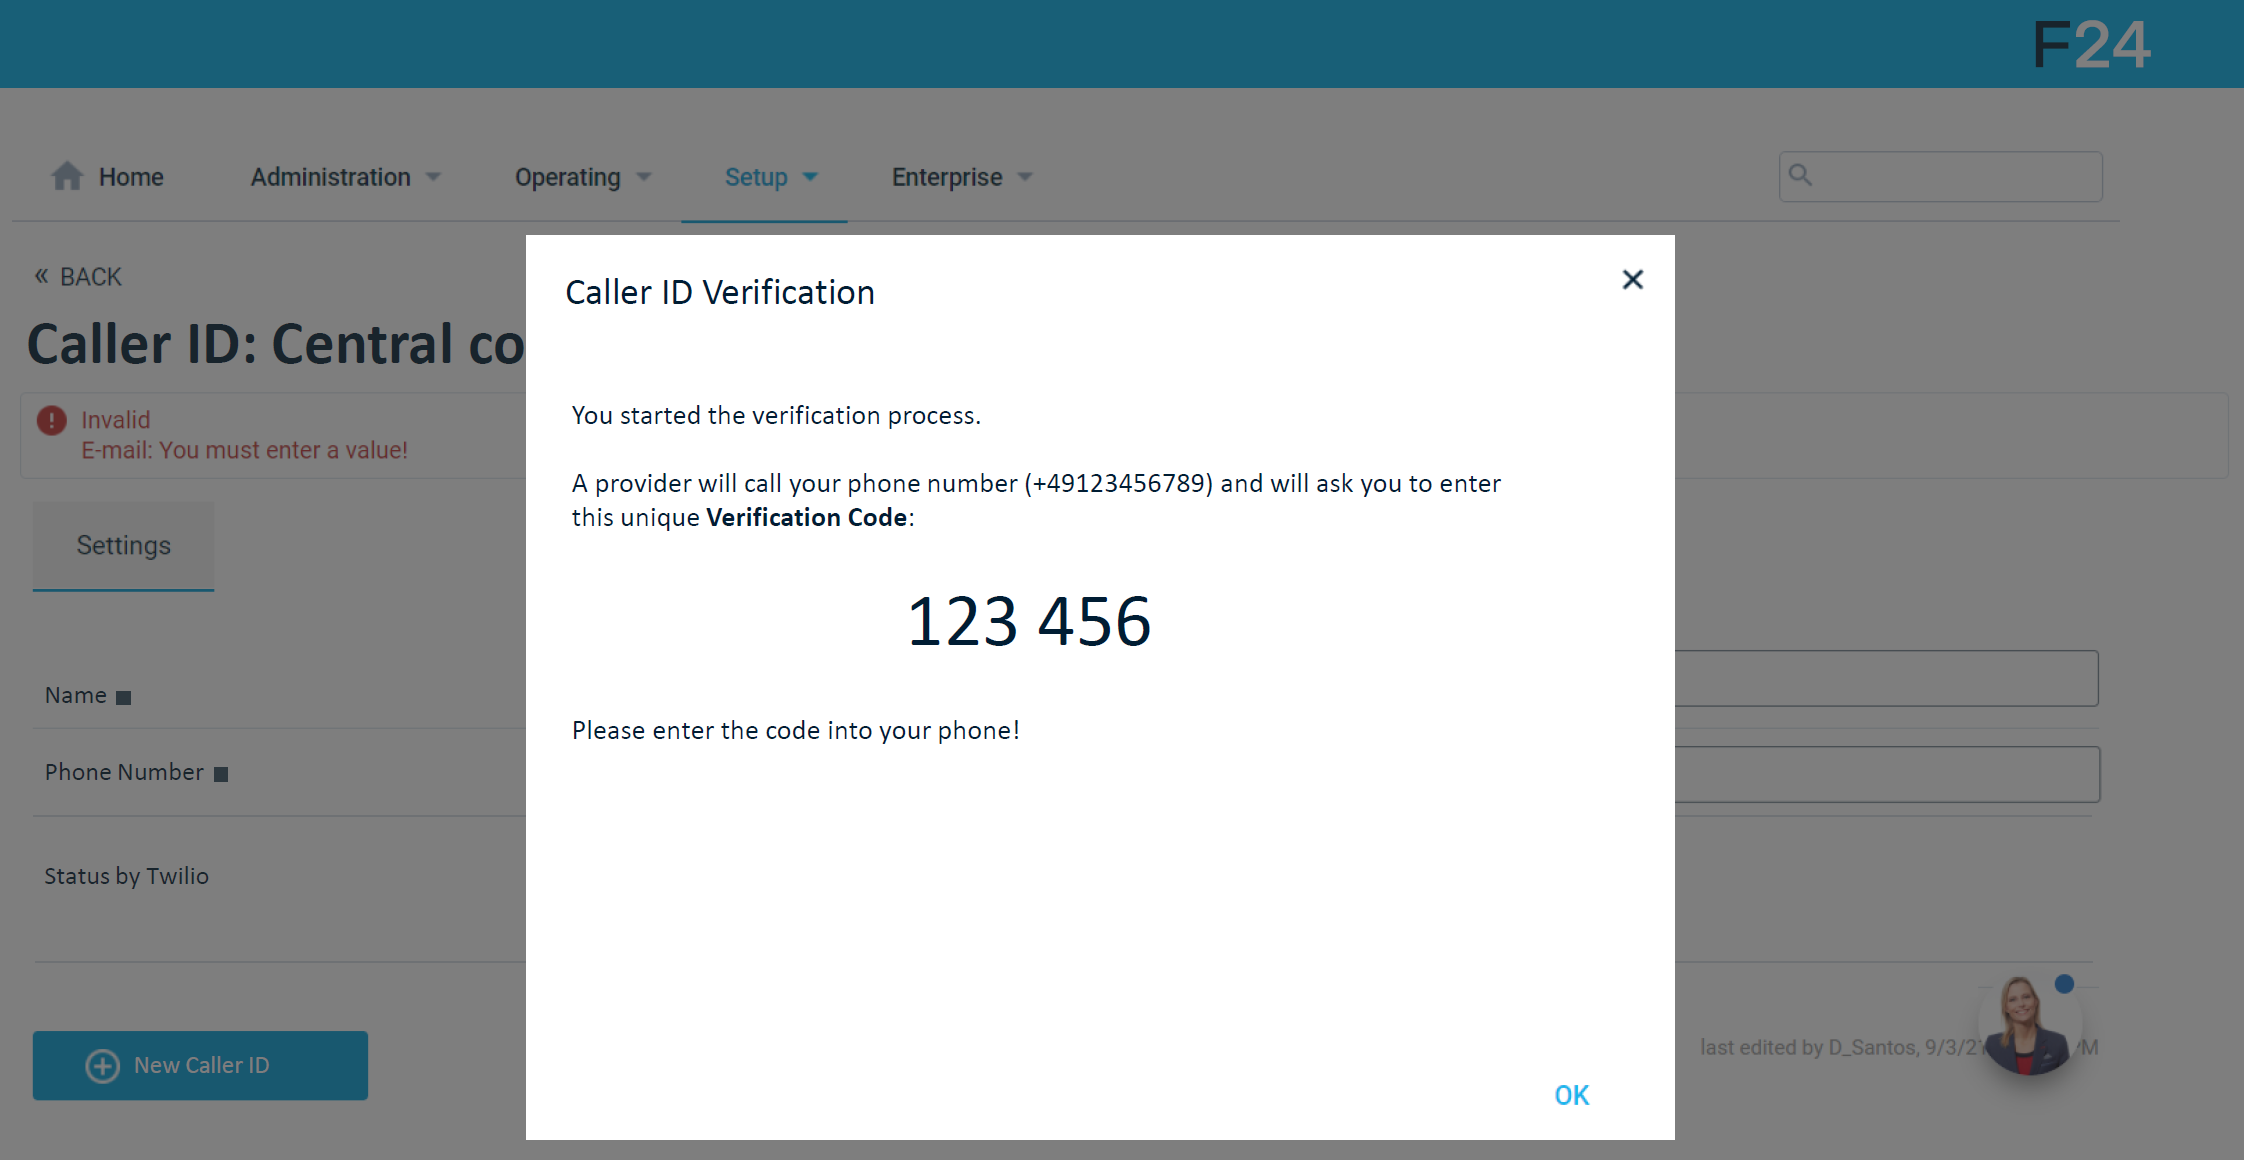
- If the code was entered correctly, the verification process was successful.
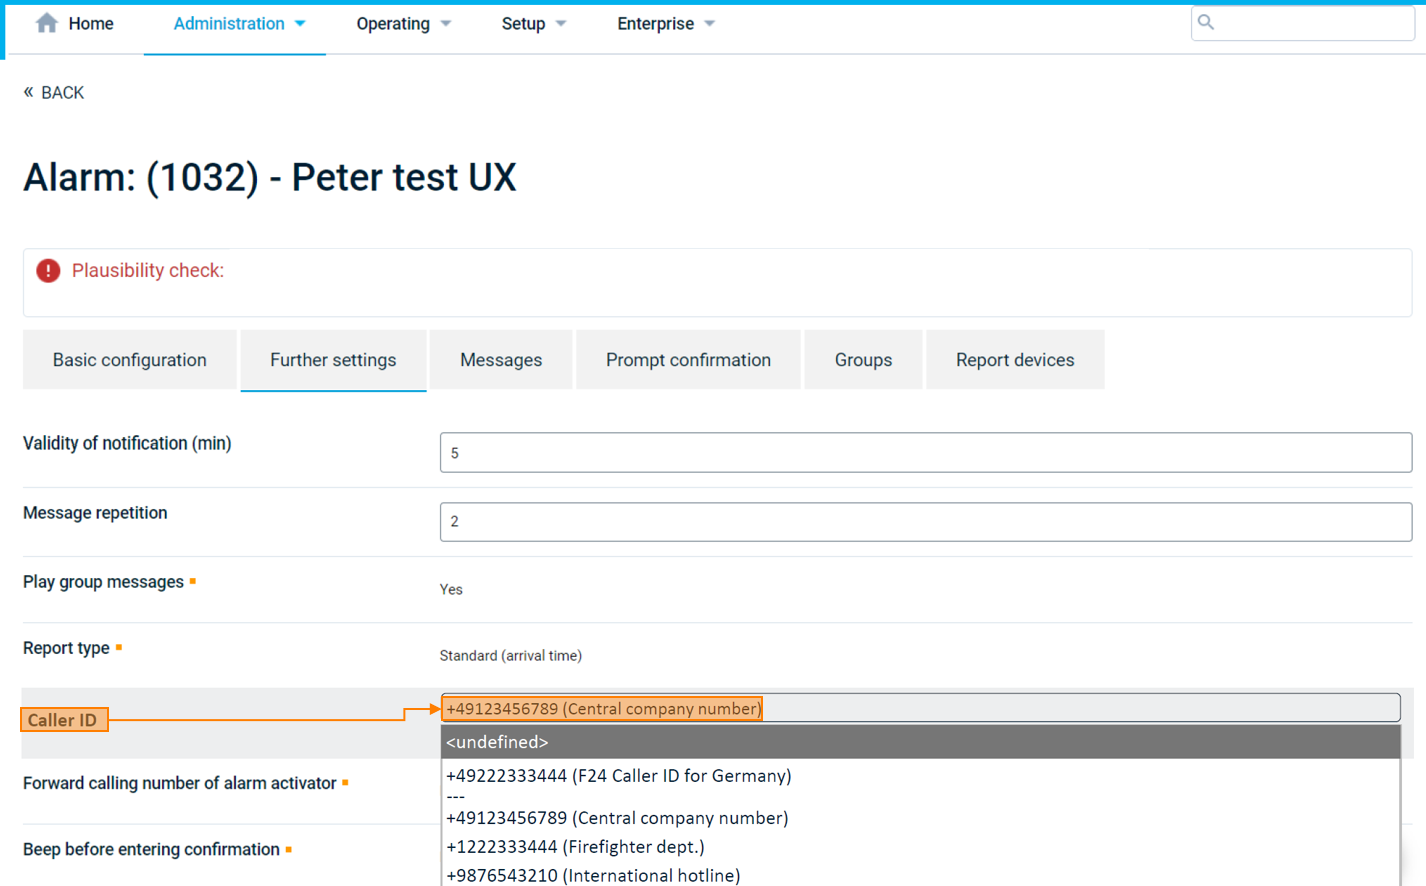
- Now to set up the verified number you click "Administration", then the respective alarm you want to assign the Caller ID to and go to "Further settings". Under "Caller ID" you can now choose the previously verified number as Caller ID.
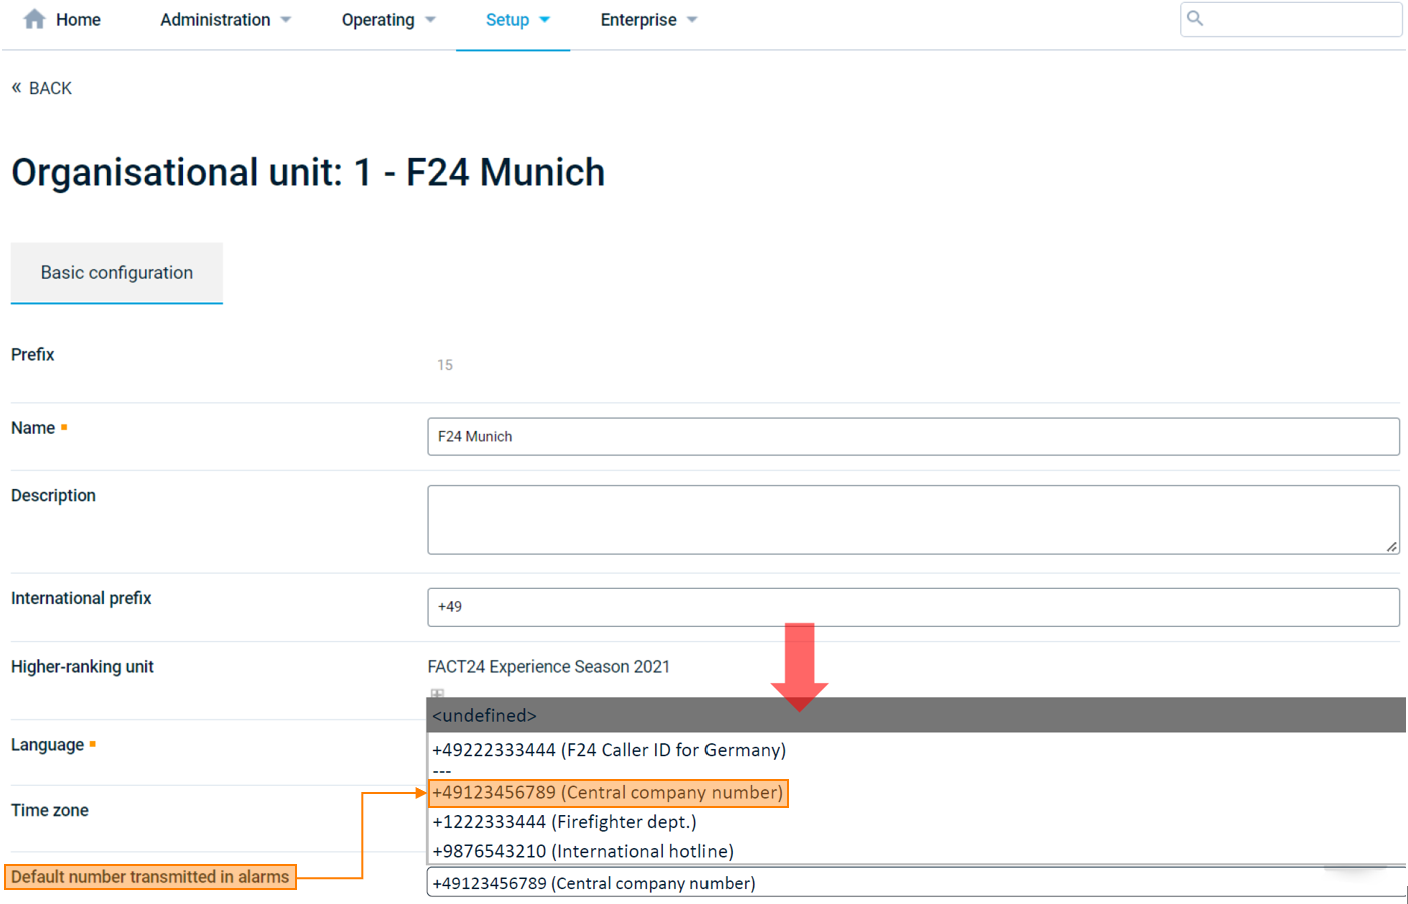
- You can also set verified numbers as default numbers transmitted in alarms throughout Organisational units. For this, go to "Setup", "Organisational units" and "Basic configuration". Here you will be able to define the previously verified number as "Default number transmitted in alarms".